
When programming machining sequences in ESPRIT EDGE, adding a new operation traditionally places it at the very end of your operations list. You then have to manually drag and rearrange it into its proper sequence, which can trigger unnecessary recalculations.
Using the Insert Location feature allows you to specify exactly where you want a new machining operation placed anywhere within your operations list before creating or loading it. This streamlines your programming workflow and saves recalculation time, especially on large, complex projects.
To define an insert location and add operations sequentially, perform the following steps:
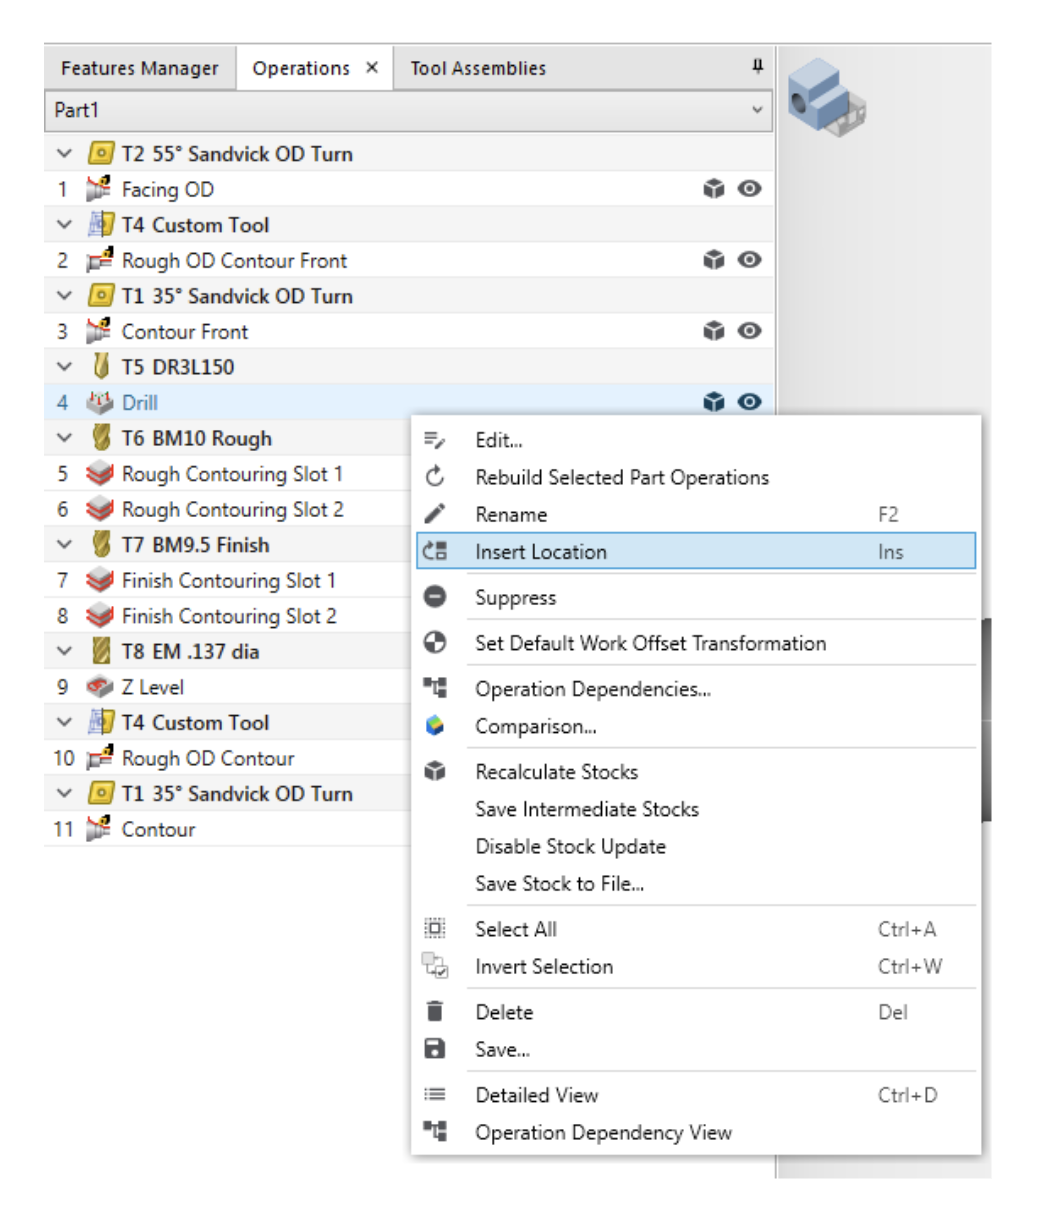
Step 1: In the Operations Manager, locate and select the existing operation before which you want your new operation to be inserted.
Step 2: Right-click the selected operation and select Insert Location.
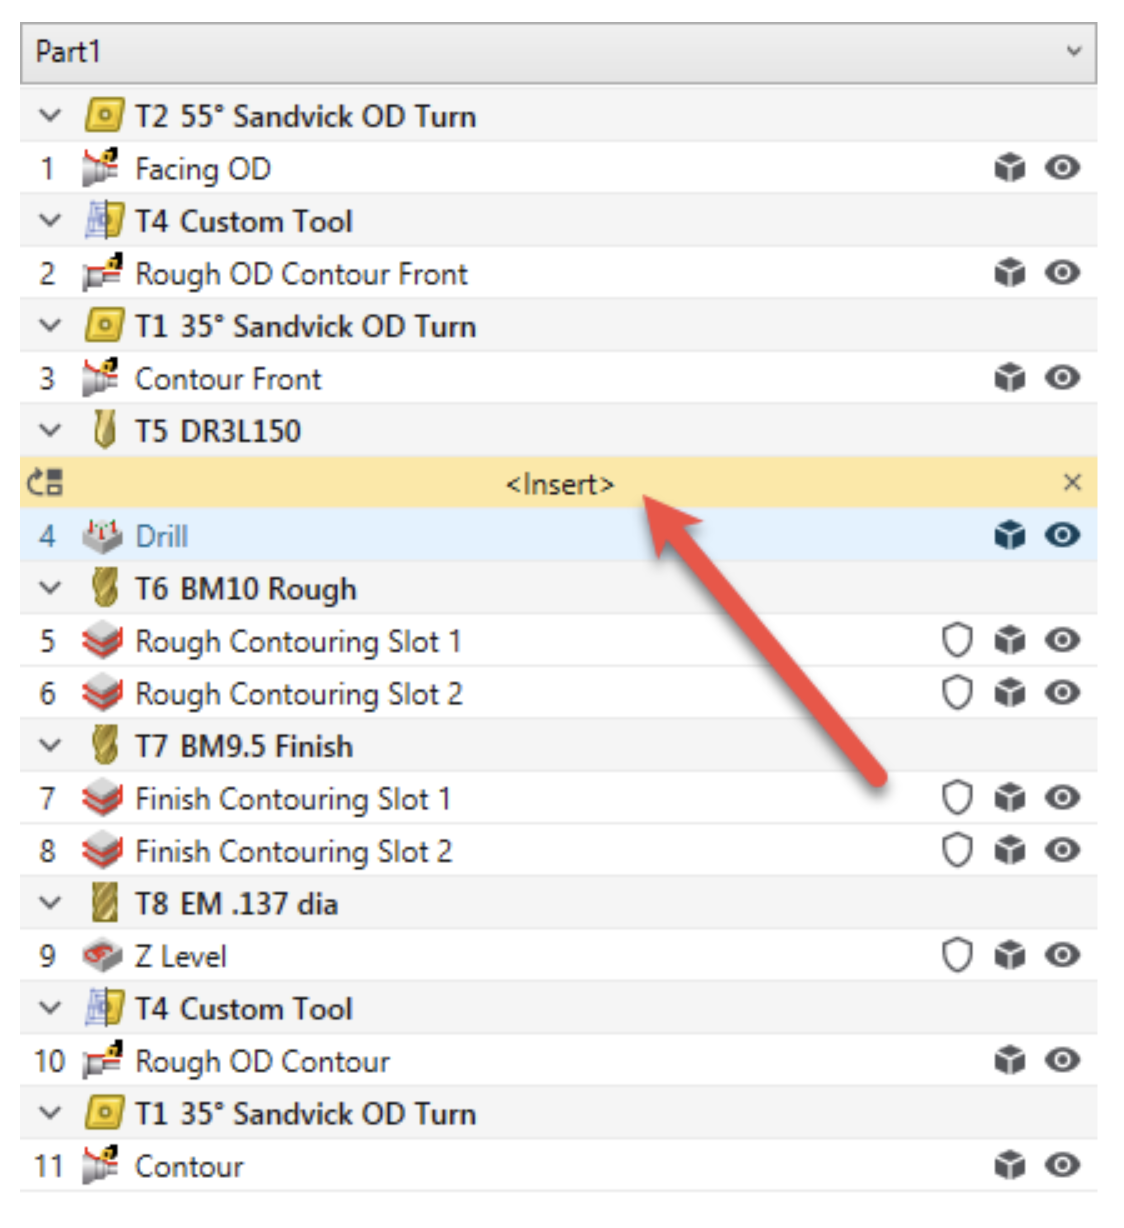
Step 3: Verify that an <Insert> location marker now appears in the operations list above that selected operation.
Step 4: Navigate to the Features Manager, select your target feature, and open or apply your desired process/operation.
Step 5: Return to the Operations Manager to confirm that the newly created operation has been added directly at the insert location.
NOTE: You can continue adding multiple operations while Insert Location is active; each new operation will automatically stack into this specified position.
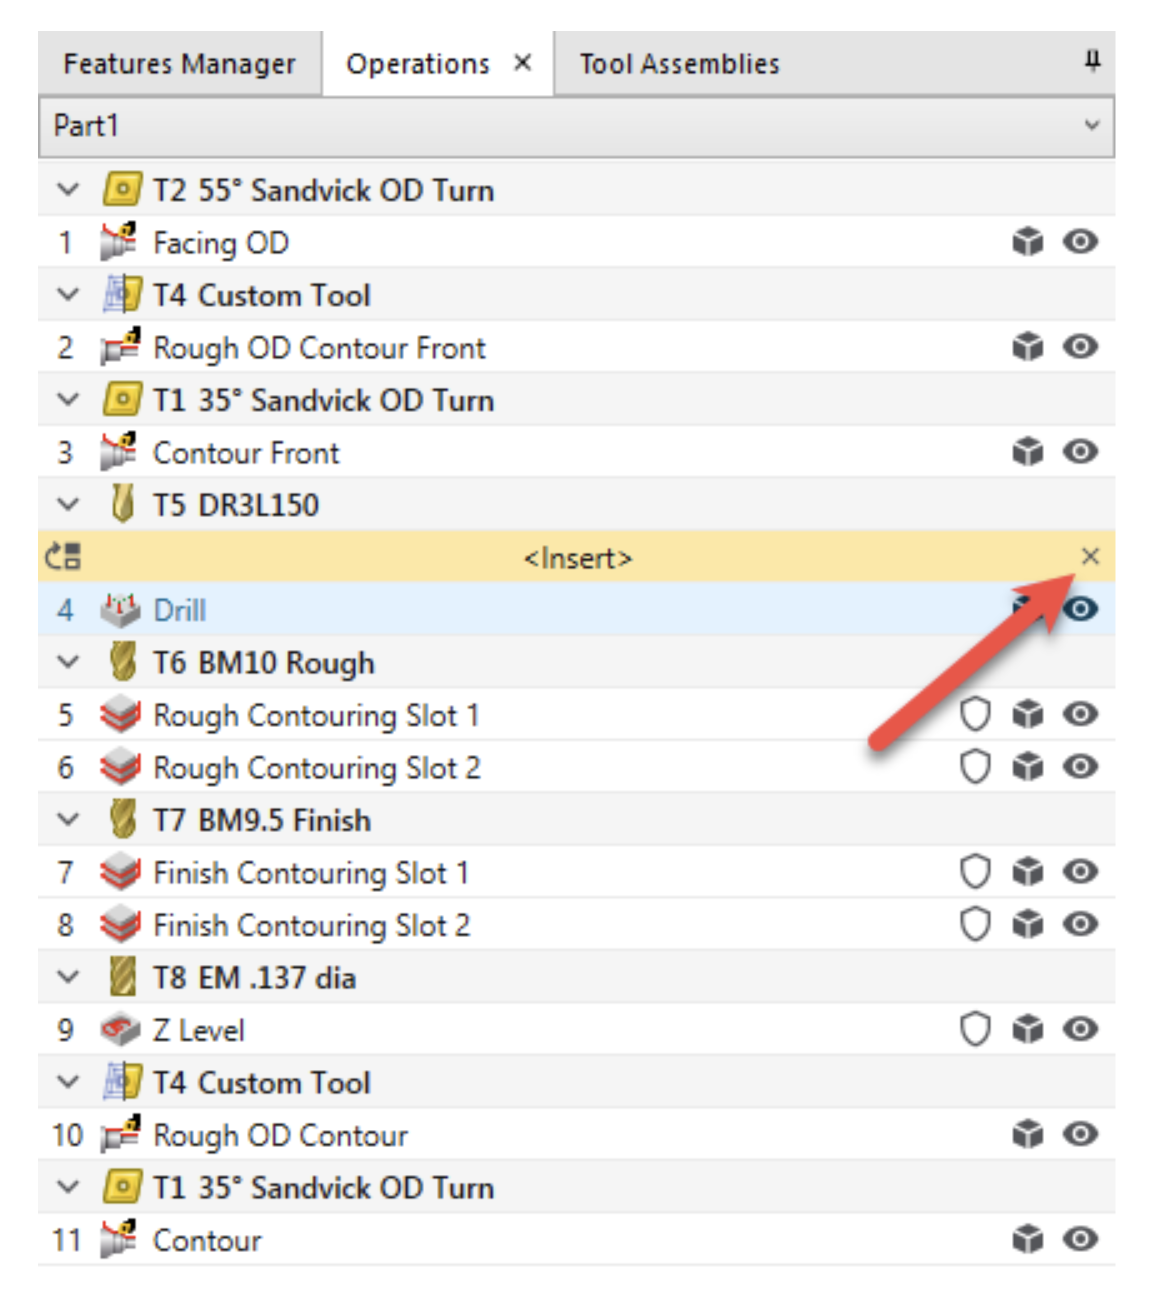
Step 6: Click the Cancel button on the Operations Manager toolbar to remove the Insert Location marker.
 For a more detailed walkthrough, you can see the associated video that is linked. For more information or to inquire about one-on-one training, please feel free to reach out to us directly.