In the world of precision machining, understanding a part’s geometry is critical for optimizing tool selection and toolpath strategies. WorkNC’s Curvature Analysis feature, found within the Analysis tab, gives machinists and programmers an efficient way to visualize and interpret surface radii across complex parts. This feature provides immediate feedback on geometry curvature, helping ensure that every tool fits its intended feature before cutting begins.
Accessing the Curvature Tool
To open the Curvature tool in WorkNC, navigate to the Graphical tab and select Analysis. From the drop-down menu, choose Curvatures.
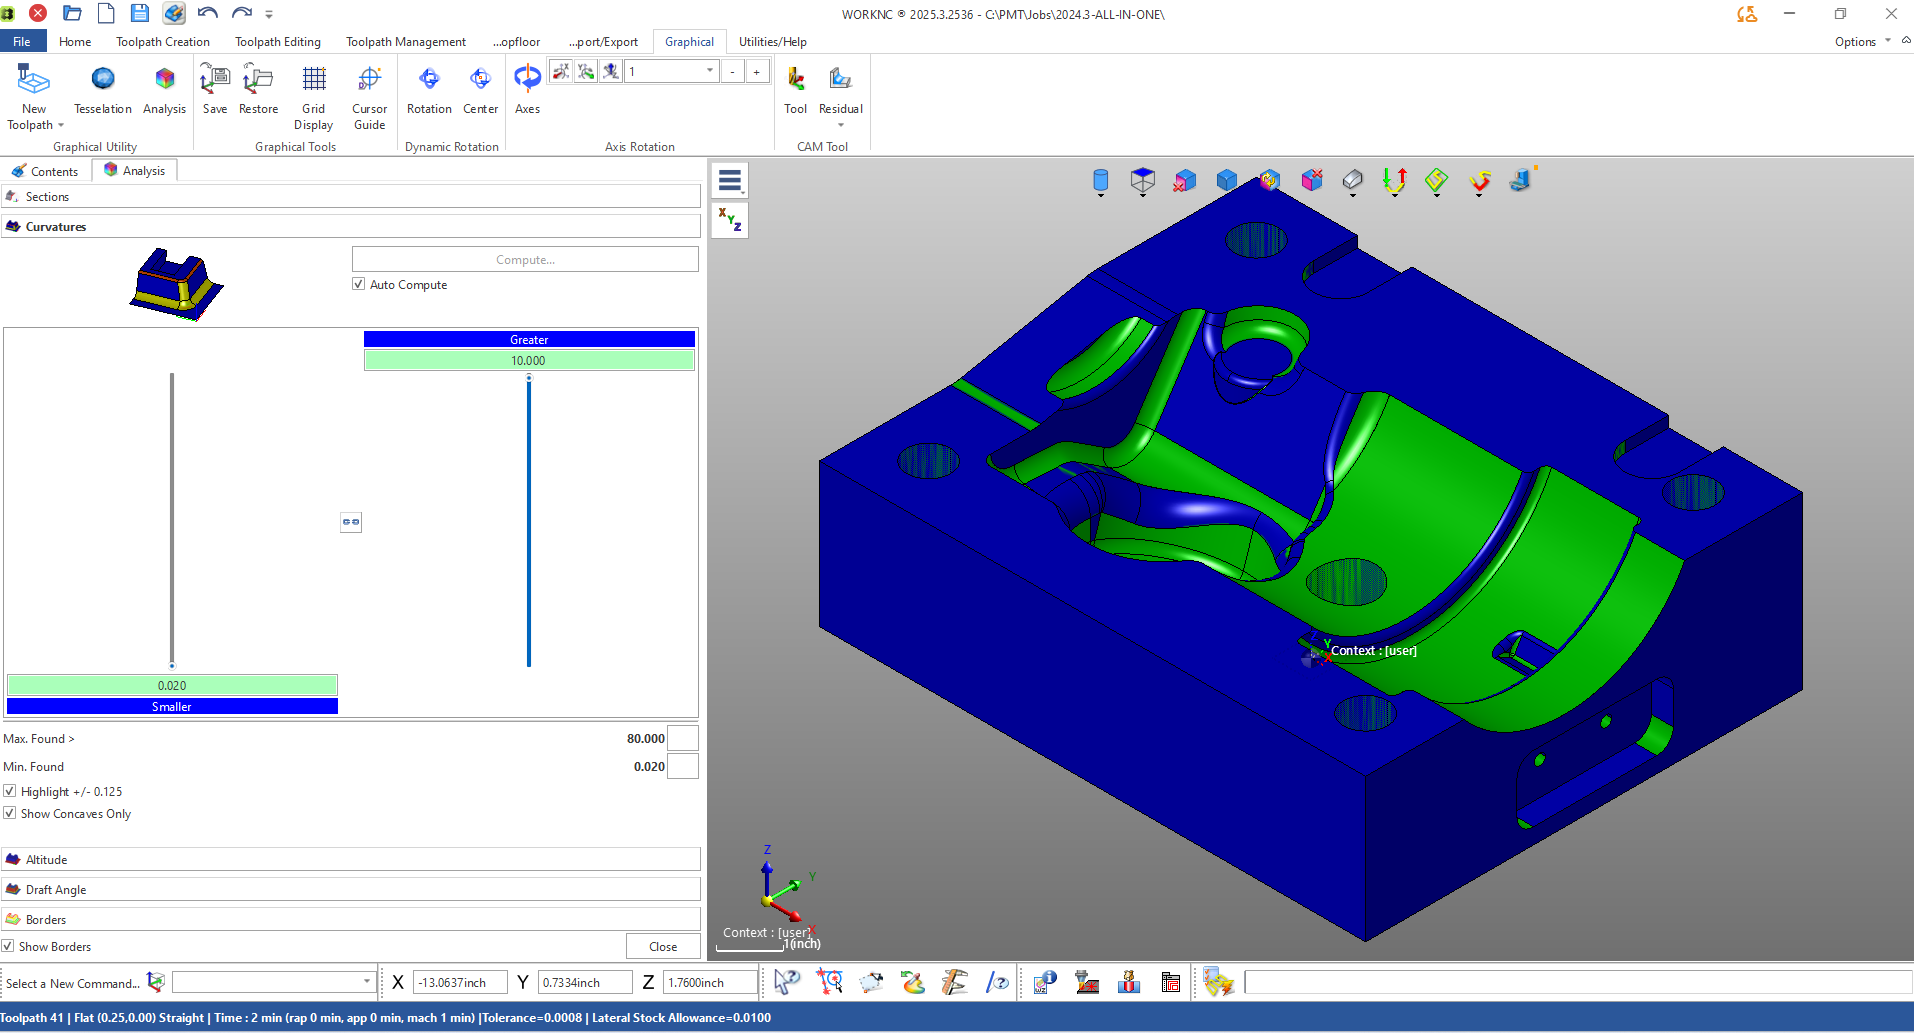
Once activated, the system computes the curvature across the part surface and color-codes the model accordingly. Areas with measurable curvature are highlighted — typically green for valid radii, making it easy to see where curvature changes occur.
Default and Custom Radius Ranges
By default, WorkNC sets a broad range for radius detection — for example, a maximum radius greater than 80 inches and a minimum radius around 0.020 inches.
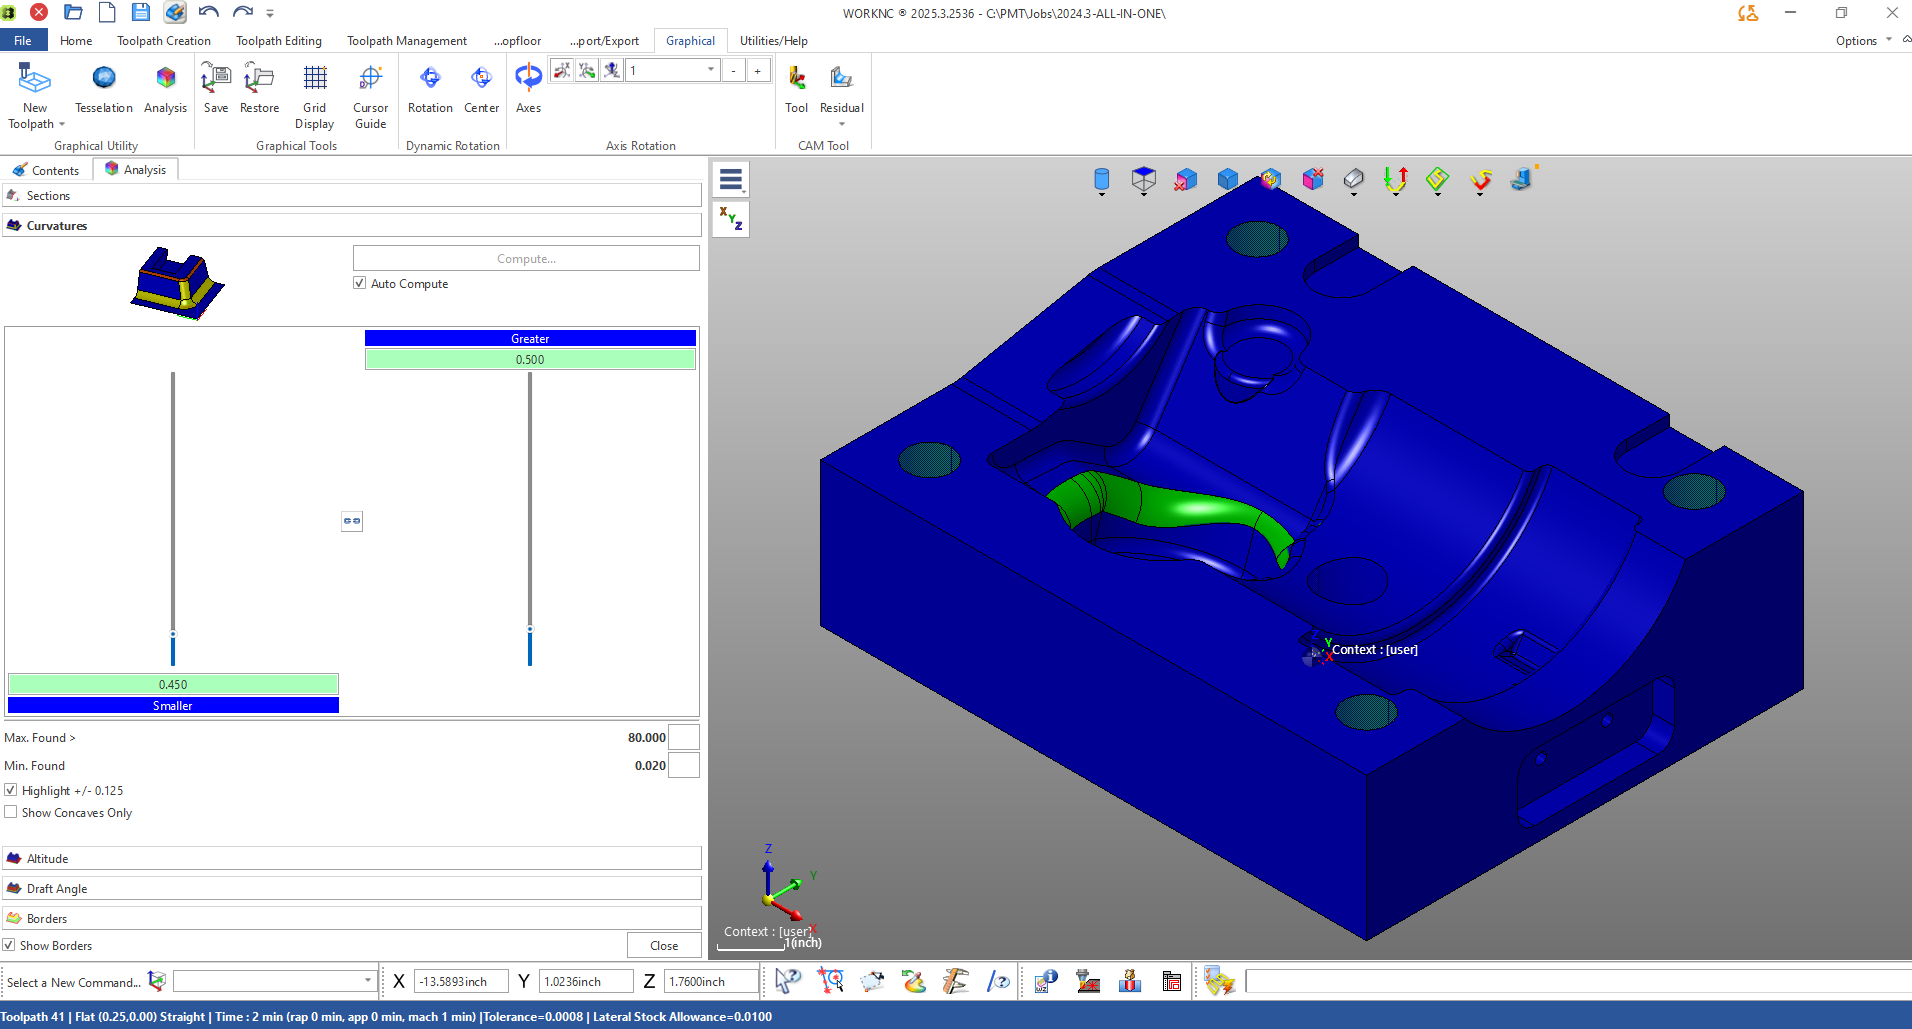
While this range captures every radius present, most users will find it helpful to refine the parameters. For instance, adjusting the maximum to 0.500" and minimum to 0.450" focuses the visualization on tool-relevant curvatures, allowing a machinist to immediately spot where a 1-inch tool can or cannot reach.
Color Coding and Highlight Options
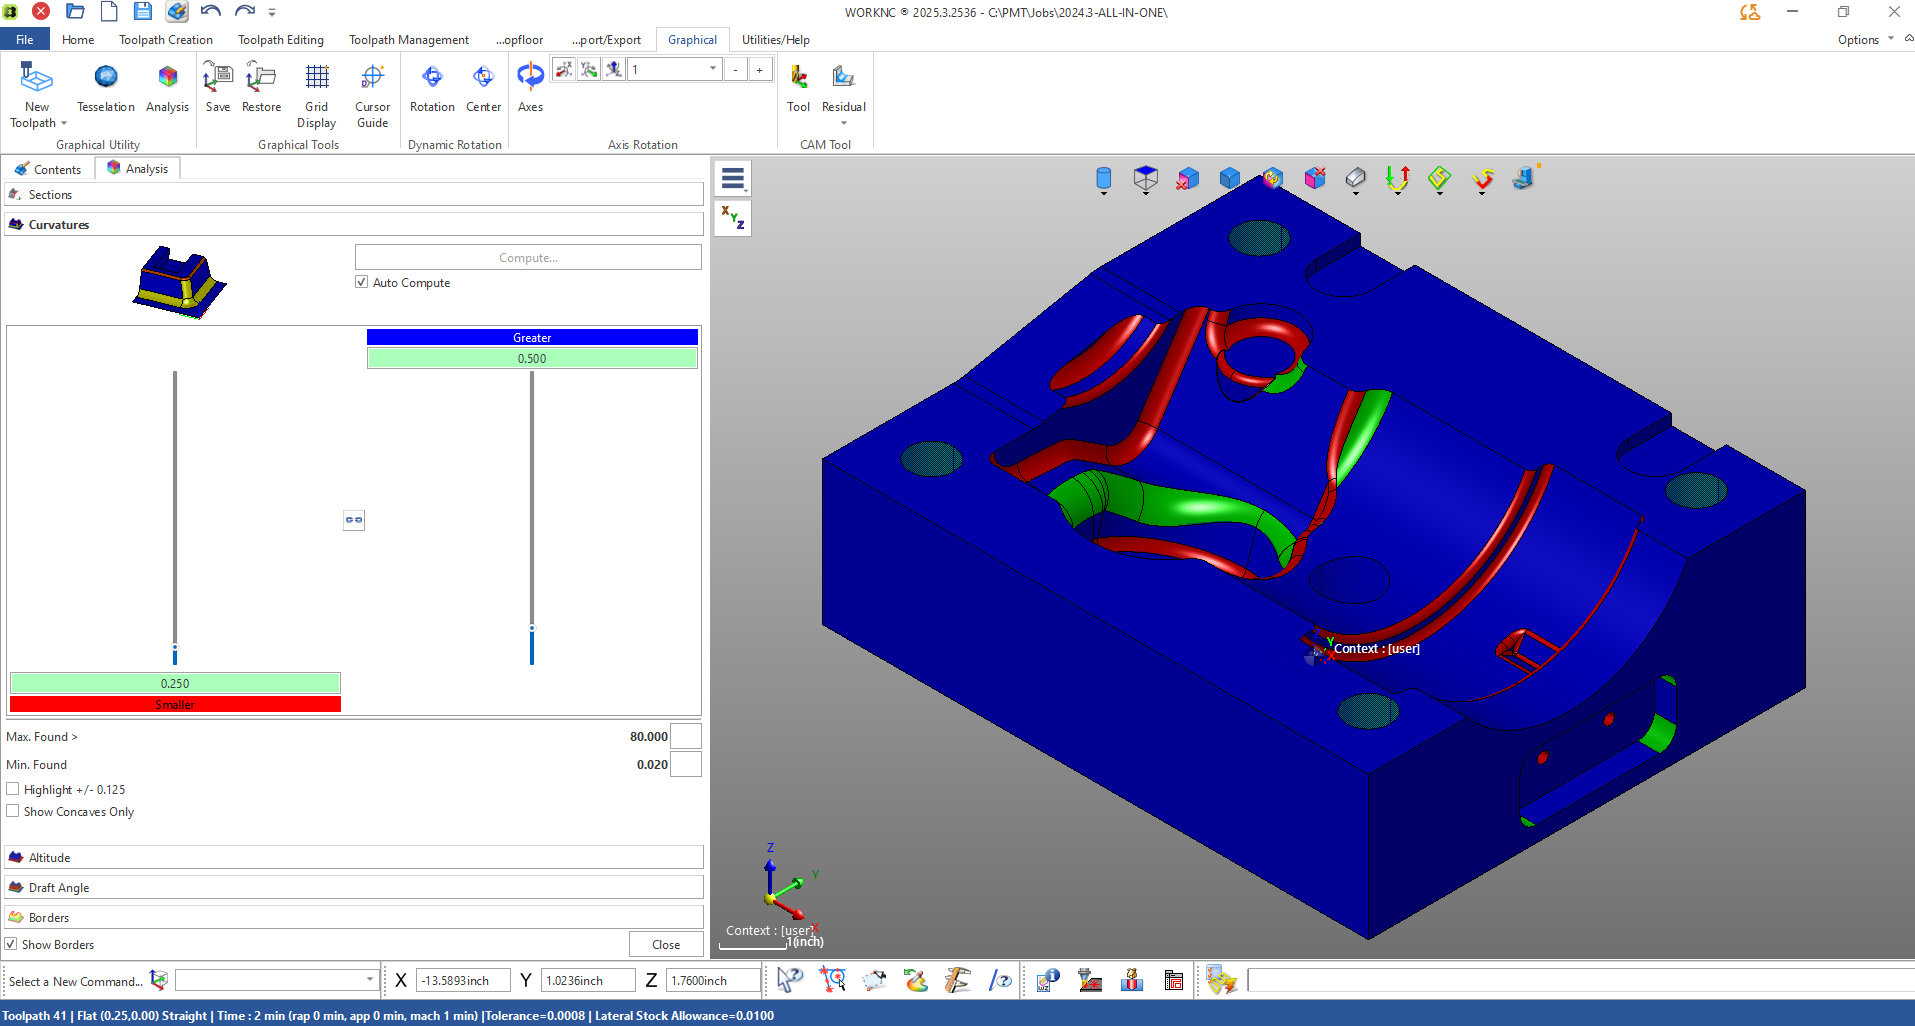
The Highlight checkbox refines visual feedback even further.
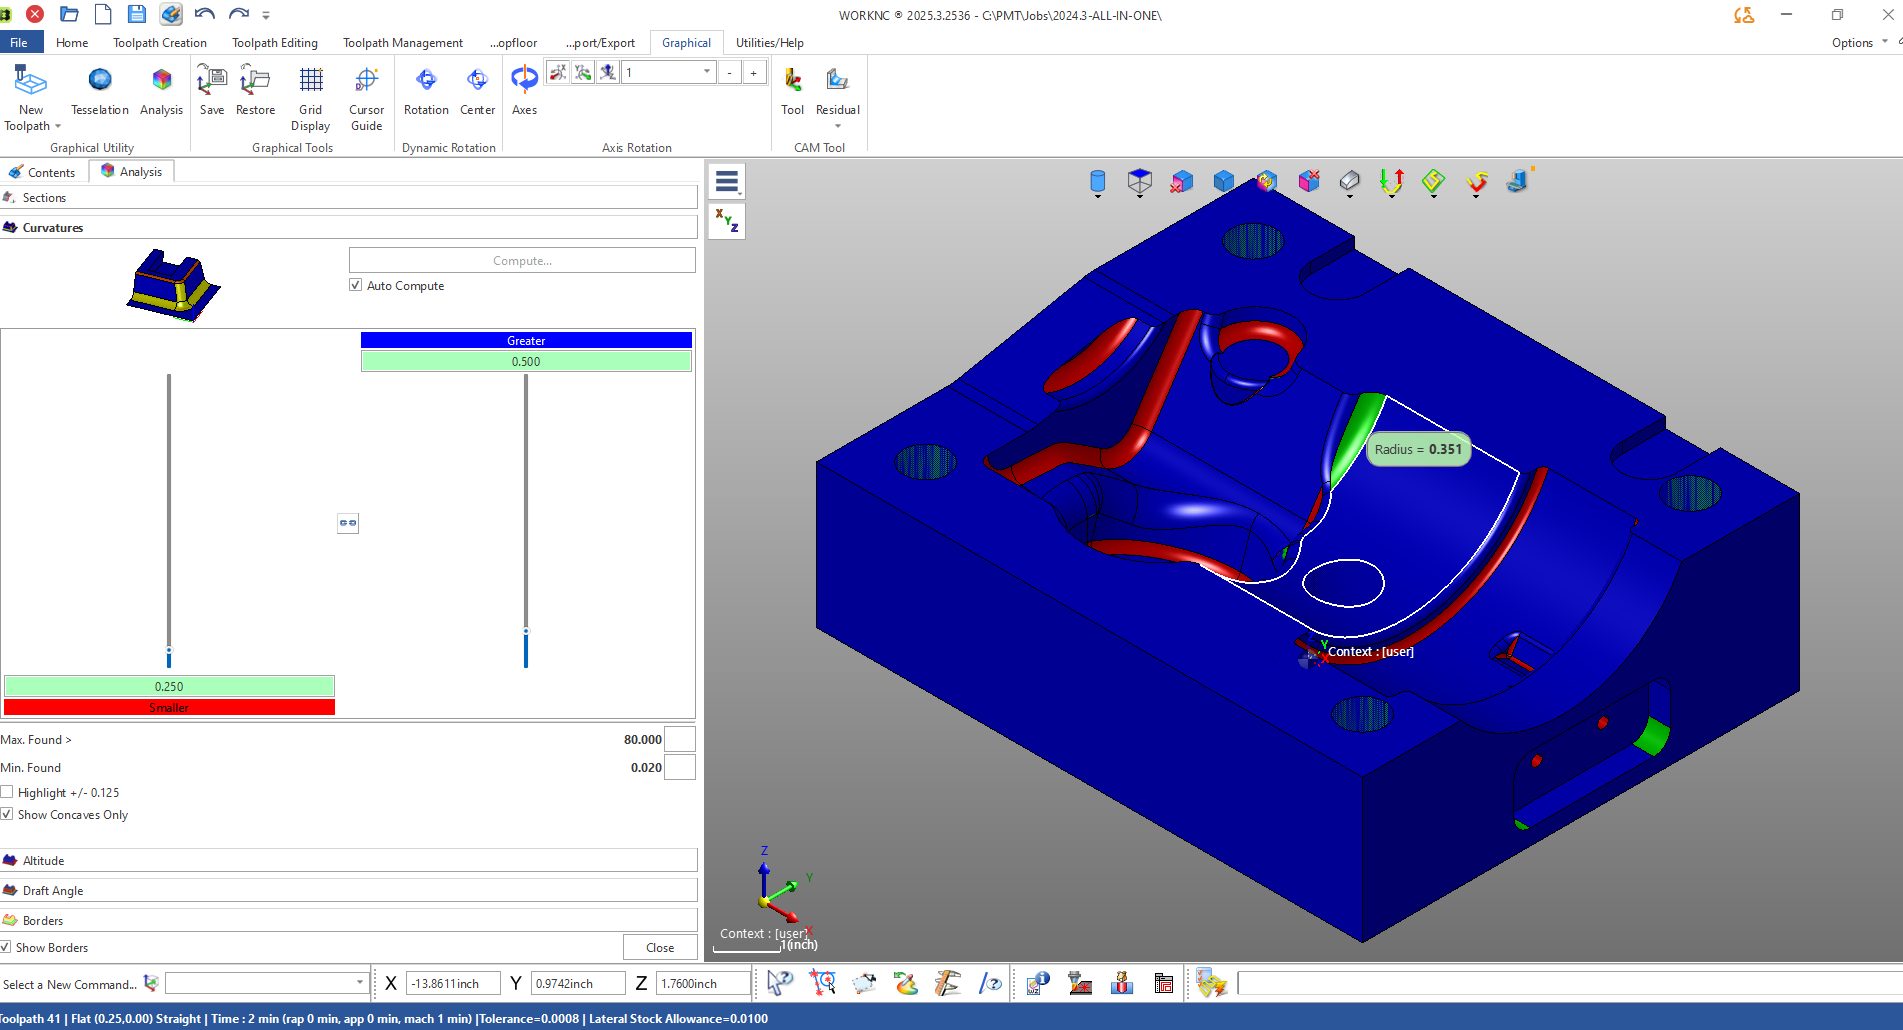
- Areas below the lower limit appear in red,
- Areas within the defined range appear in green, and
- Areas above the maximum appear in blue.
This color system quickly communicates which areas meet machining constraints and which require smaller cutters or alternate strategies.
Focusing on Concave Features
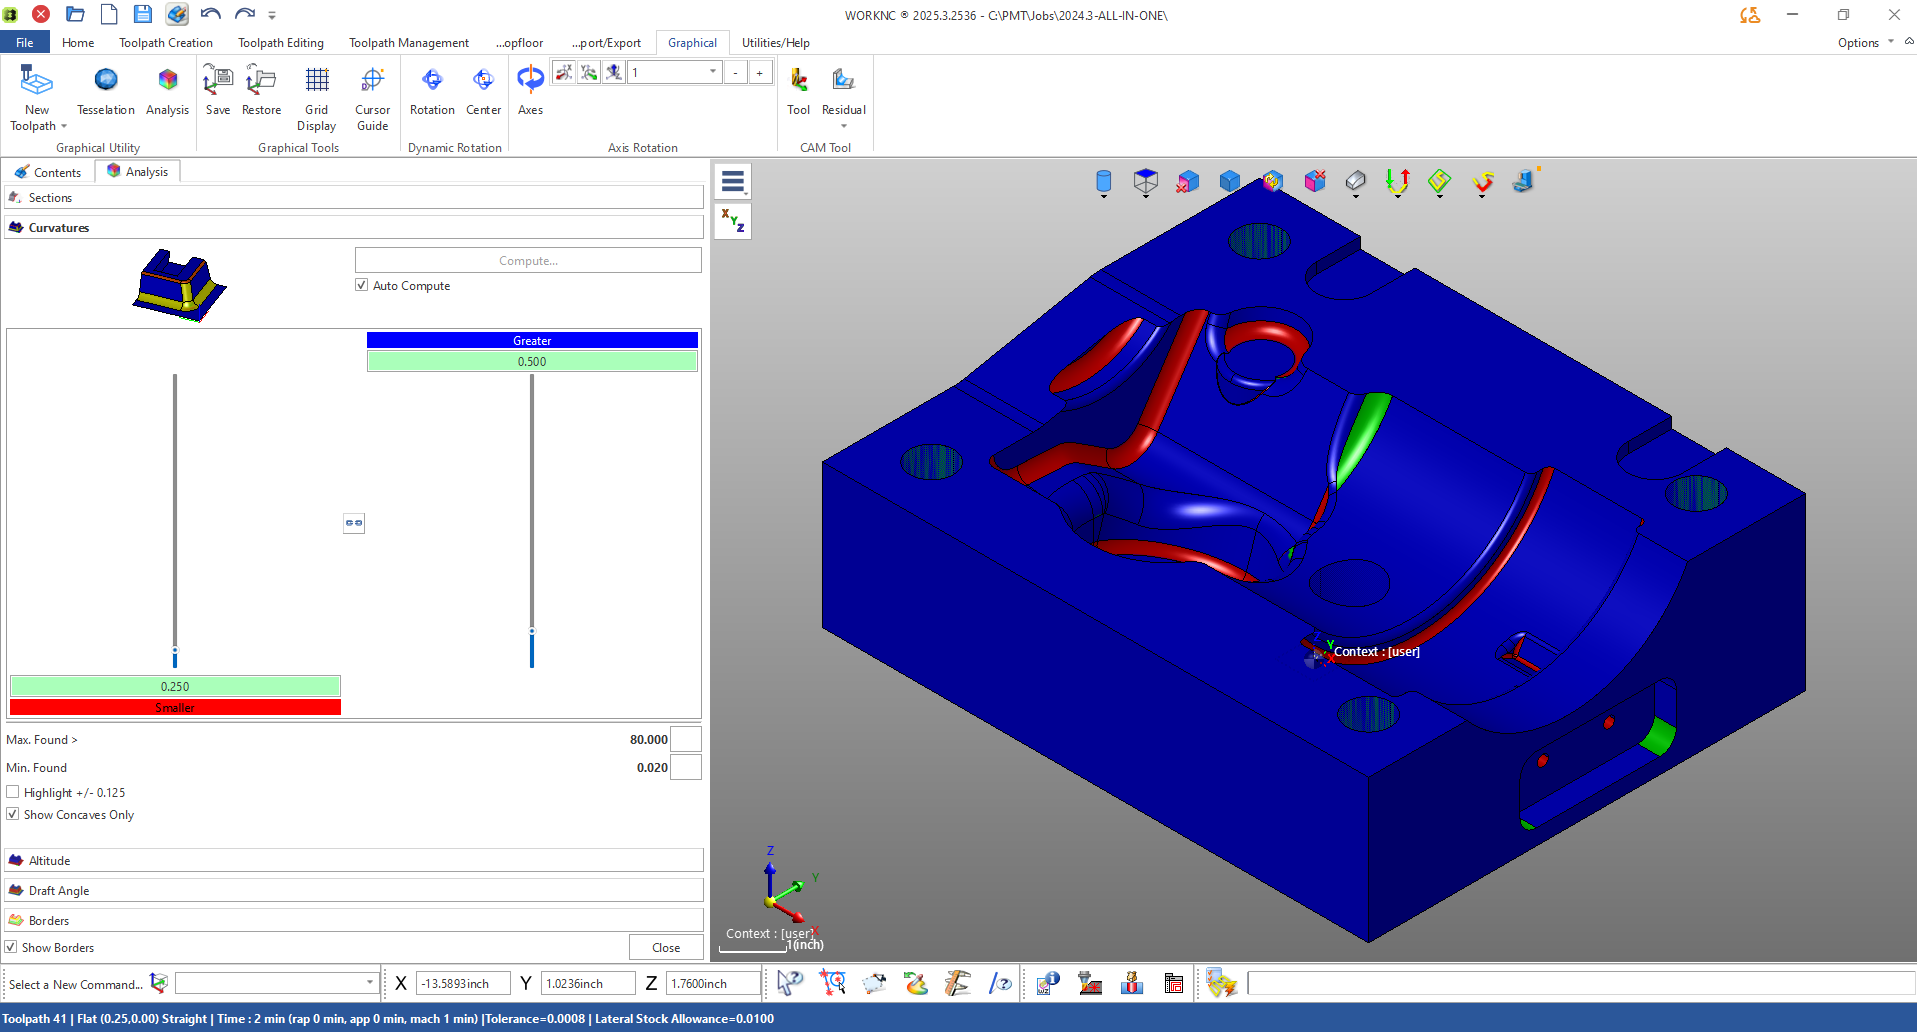
A valuable checkbox within the menu — “Show Concave Only” — isolates only concave geometry.
This distinction is crucial because concave (internal) radii often determine the smallest allowable cutter size. Convex (external) radii can be machined with larger tools, but internal rads must accommodate the physical size of the cutter. By isolating these regions, machinists can immediately identify tight inside corners that might require a reduced tool diameter.
Interactive Radius Identification
One of the most intuitive aspects of WorkNC’s curvature tool is interactive feedback.
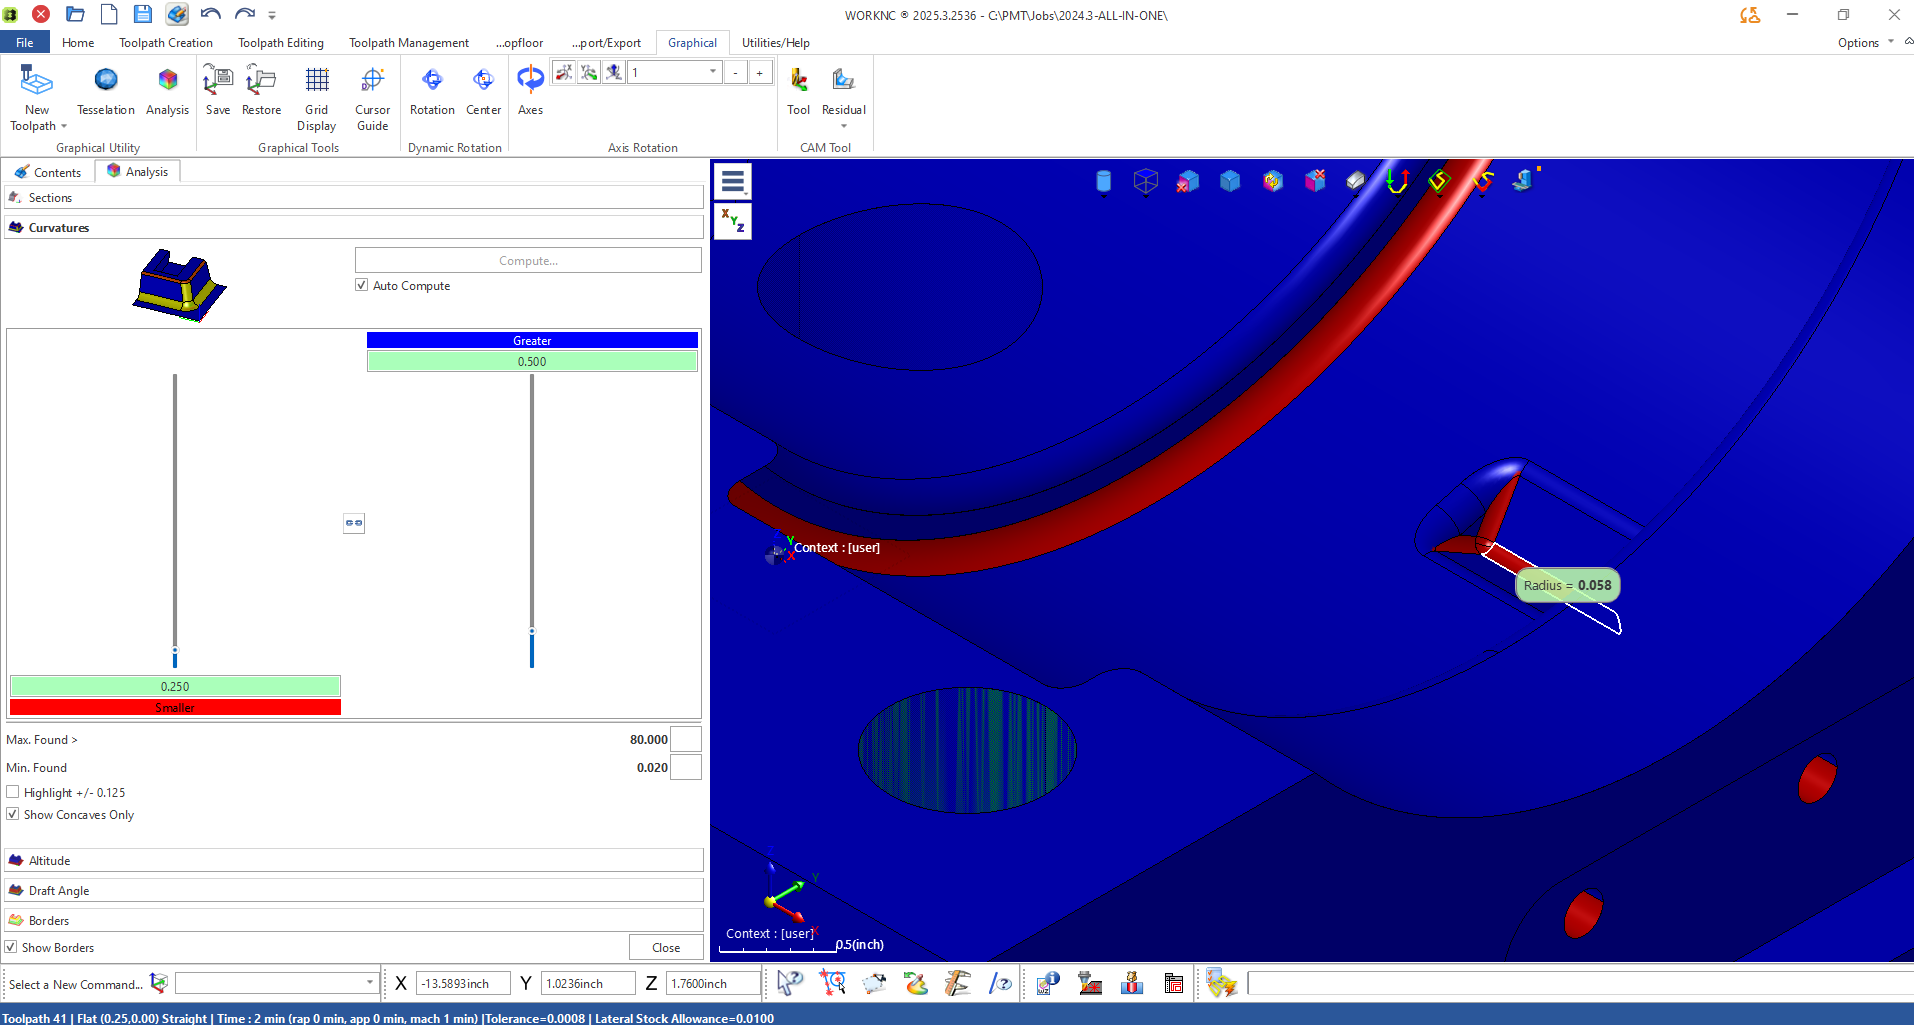
Users can click directly on the model to see the exact radius value at that point. This includes both concave and convex features, as well as circular holes. For example, hovering over a fillet or bore instantly reports a value like Radius = 0.351”, displayed dynamically in the graphics window.
Adjusting and Refining Display Parameters
The color gradient and slider controls allow further refinement of visual output. You can narrow or expand the curvature range dynamically, immediately updating the on-screen colors. This makes it easy to focus on specific curvature zones relevant to a given cutter diameter or toolpath strategy.
Comprehensive Visualization
As the curvature settings are refined, the model provides a fully color-coded view of all detectable surface radii — from large sweeping contours to tight internal pockets. This gives machinists a clear visual map of geometry complexity before toolpath generation begins.
Conclusion
The Curvature Analysis tool in WorkNC is more than a visual aid — it’s a precision planning instrument. By identifying critical radii, isolating concave areas, and mapping curvature values directly onto the model, machinists can make informed tooling decisions early in the programming process.
This proactive insight reduces trial and error, minimizes cutter wear, and improves machining efficiency — ensuring a smoother workflow from CAD to CAM to CNC.
